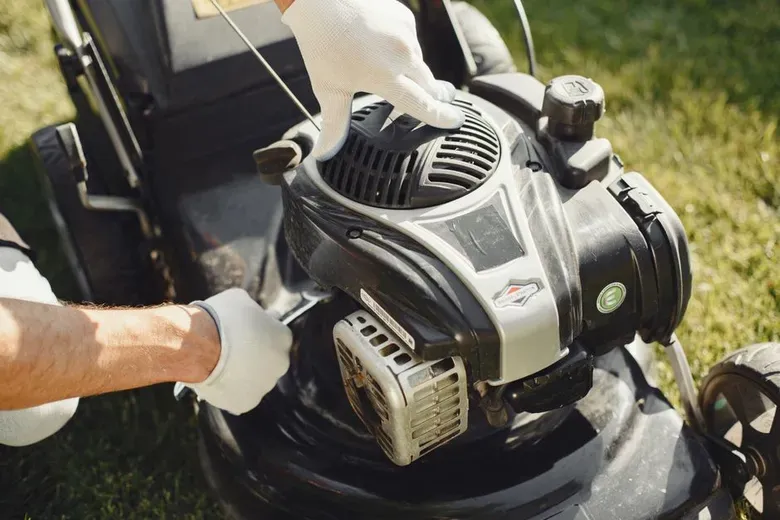
How to Clean a Lawn Mower Carburetor
Learn safe, step-by-step carburetor cleaning steps, how to disassemble carburetor, and when to use a carburetor rebuild kit for reliable lawn mower carburetor maintenance.

Keeping your equipment running smoothly starts with understanding how to clean a lawn mower carburetor, because a dirty carburetor is one of the most common reasons a small engine loses power, stalls, or refuses to start.
Over time, varnish, old fuel, and tiny particles can clog jets and passages, disrupting the precise air-fuel mixture your engine needs. By learning the proper carburetor cleaning steps, you can restore reliable performance without replacing expensive parts. Regular lawn mower carburetor maintenance saves you time, reduces frustration, and extends the life of your machine, making every mowing session smoother and more efficient.
Signs Your Carburetor Needs Cleaning
Before diving into the how to disassemble carburetor process, it helps to recognize the symptoms of a dirty unit. Common signs include rough idling, frequent stalling, hard starting, a lean or uneven running condition, and black, smoky exhaust. You might also notice a strong fuel smell or see fuel leaking from the carburetor when it sits for a while. If the engine floods easily or refuses to reach full speed, chances are your carburetor is partially blocked and in need of attention.
Gather Tools and Materials
Preparation makes the job faster and cleaner. Gather basic hand tools such as screwdrivers, wrenches, and a socket set that match your machine’s hardware. You will also need a carburetor cleaner spray, a soft-bristle brush, compressed air if available, clean rags, a drain pan, and a small container to keep screws and tiny parts organized. A carburetor rebuild kit is useful if you discover worn gaskets or diaphragms during the job. Having these items ready ensures you can complete the entire process without interruptions.

Safety and Preparation
Always start with a cool engine and disconnect the spark plug wire to prevent accidental starts. Wear gloves and eye protection, and work in a well-ventilated area to avoid inhaling fuel vapors. If the machine has been running, let it cool completely. Place the mower on a stable surface, and if you are tilting it to access the carburetor, be careful not to introduce air into the fuel system or spill fuel into the engine. Safety and patience reduce the risk of damage and injury.
Draining and Removing Fuel
Begin by running the engine until it stalls from fuel depletion, or carefully siphon or drain the fuel into an approved container. With little or no fuel in the tank, locate the carburetor, which is usually mounted between the air filter and the engine cylinder. Identify the fuel line, the throttle linkage, and any choke or primer components connected to it. Document the positions of hoses and linkages with your phone or notes so you can restore everything correctly later.
How to Disassemble the Carburetor
To how to disassemble carburetor properly, start by removing the air filter housing and the cover that protects the carburetor. Label and remove the fuel line, taking care to catch any residual fuel. Disconnect the throttle linkage and throttle rod, and unbolt the carburetor from the intake manifold if it is attached. Gently lift the carburetor away, keeping the float bowl portion level to avoid spilling residual fuel. Place all hardware in your container and avoid forcing any parts that seem stuck, as they may simply need a gentle twist or the right tool.

Inspecting and Cleaning Each Component
Once disassembled, carefully examine the carburetor body, float, needle valve, and jets for deposits, corrosion, or damage. Use a carburetor cleaner spray and the soft-bristle brush to loosen grime from external surfaces, vents, and tiny ports. For stubborn deposits, let the cleaner soak for a few minutes, then rinse with clean parts solvent if needed. Blow out passages with compressed air, being mindful that excessive pressure can damage small components. Pay special attention to the jets, where even a tiny blockage can drastically affect performance.
Replacing Seals and Gaskets
Inspect gaskets, seals, and diaphragms for cracks, brittleness, or swelling. If you have a carburetor rebuild kit, replace any worn items to prevent future leaks and ensure proper air-fuel ratios. Handle new seals gently and coat them lightly with clean fuel before installation so they seat smoothly. Avoid overtightening screws, as this can distort the carburetor body and create new problems. Reassembly should mirror your disassembly order, with each connection secure but not forced.
Reassembly and Testing
When you reattach the carburetor, double-check that all hoses and linkages are in their correct positions. Reconnect the fuel line carefully, then refill the tank with fresh fuel. Before starting the engine, pull the starter rope gently a few times to prime the carburetor and clear any air from the system. Start the engine and let it warm while you monitor for smooth idling, steady running, and normal exhaust color. Adjust the idle mixture screw only if you are familiar with the procedure, or note any running issues for further diagnosis.
Troubleshooting After Cleaning
If the engine still runs poorly after cleaning, check for air leaks in hoses, a stuck float, or clogged filters. Verify that the fuel cap vents properly, as a vacuum can prevent fuel flow. Confirm that the spark plug is clean and that the ignition system is functioning. When in doubt, repeat the cleaning process or inspect the carburetor rebuild kit components for overlooked damage. Persistent problems may indicate a more serious mechanical issue that benefits from professional service.
Establishing a Routine Maintenance Schedule
Regular lawn mower carburetor maintenance is easier than emergency repairs. Use fresh fuel mixed with the correct stabilizer, avoid ethanol-heavy blends when possible, and run the engine periodically during the off-season. Clean or replace the air filter at least once per season, and check the carburetor for early signs of varnish or fuel odor. By performing simple preventive steps, you reduce the frequency of deep cleanings and keep your mower ready whenever you need it.
Frequently Asked Questions
How often should I clean my lawn mower carburetor?
For most homeowners, cleaning the carburetor at least once per season or when storing the machine for winter is sufficient. Increase frequency if you notice performance issues, use stale fuel, or operate in dusty conditions, as these factors can accelerate buildup inside the carburetor.
Can I use brake cleaner instead of carburetor cleaner?
While brake cleaner can dissolve some residues, it is not formulated for carburetor components and may damage rubber parts, diaphragms, and seals. Stick with a dedicated carburetor cleaner spray to ensure compatibility and avoid causing leaks or malfunctions in delicate parts.
Do I need a rebuild kit every time I clean the carburetor?
Not every cleaning requires a carburetor rebuild kit; many jobs involve only cleaning jets and passages. However, if you notice worn gaskets, cracked diaphragms, or persistent leaks after reassembly, replacing those items with a kit is the best way to restore long-term reliability.
What should I do if the engine still won’t start after cleaning?
Check the spark plug, fuel freshness, and air filter condition first. Verify that the fuel line is not kinked and that the carburetor bowl is filling properly. If the problem continues, inspect for clogged jets, air leaks, or float issues, and consider consulting a professional technician for more advanced diagnostics.